Pages

Friday, December 9, 2011

Last Blog Post of 2011!!!

TGIF! What a week I have had busy bee I am these days. My family and I are getting ready to head home to Nova Scotia next week to spend Christmas with our family and friends J I still have quite a few projects to wrap up before we leave so I am going to say this may be my last post until after we return to Ottawa in the New Year.

My Occasions Mini and Sale a Bration preorder arrived this afternoon and I could hardly wait to get down to my craft room to get started with the fabulous new products! Boy was I happy when I realized I would be able to use one of them on this week’s card!!!

As I mentioned time is a precious commodity these days and so I took a few of my favourite challenges and mashed them all into one this week! I took the sketch from Freshly Made, the Colour Combo & Theme from Friday Mashup and the Dazzle aspect from Pals Paper Arts and this is what I came up with!

My Challenges:
  1. Make a project featuring "Snowmen".
  2. Or Make a project using the colors "Blushing Bride, Baja Breeze & Basic Grey".
  3. Or "Mash it Up" and create a "Snowman project with the colors Blushing Bride, Baja Breeze & Basic Grey".
“Fred Astaire knew that it was fun to get dressed up for a special occasion.  And occasionally we like to dress up our paper craft projects as well.  Whether you choose to add a little or add a lot, show us the sparkle, shine, or decoration that makes your project just a little bit fancier.  We fancy what you create!!"

My Card:
 Tiny Tips:
Glitter – I know most of us love to use this delightful embellishment but it can sometimes be quite a pain when it gets all over the rest of the elements on your card that you do not want to “sparkle”. Usually I fully assemble my card and then add glitter but with this particular card that little trick would not work as I would be sure to get glitter on the ribbon as I was shaking off the access glitter. I was then concerned about glittering the snowman and then having to flip it over to add adhesive and possibly smudging my glitter and taking away the puffy look – SO I added my adhesive to the back of my card stock before applying to glitter and simply help the card stock up to apply my two way glue, glitter and then placed it on my card. Worked like a charm!

Thanks for stopping by!

Monday, December 5, 2011

Mojo/PPA Mashup!

Happy Mojo Monday evening everyone J The hustle and bustle is upon us and I too am feeling the heat... So little time to craft!!! That being said I have decided to combine another challenge this week. I am going with the Mojo Monday sketch and the Pals Paper Arts Colour Challenge for this card.

My Challenge:
My Card:
Tiny Tips:
I have been using designer paper for quite a few cards this holiday season but instead of going with a colour design pattern for this project I decided to give my card a little pizzazz with a same colour design by using my Vintage Wallpaper Embossing Folder.
Thanks for stopping by!  

Thursday, December 1, 2011

Look What I Found!!!

The Christmas Season is upon us now and I just can’t seem to get enough of Christmas Cards!!! I went a little silly this year and bought many fabulous Christmas Stamp Sets but this one has to be my favourite!!! I LOVE Snowman J

I have been a little lost with my colour selections lately and boy have I found the answer! I came upon a new challenge site http://colorthrowdown.blogspot.com which provides you with a different colour swatch each week to work with J So I decided to combine the Mojo Monday sketch with the Colour Throw Down swatch and this is what I came up with!

My Challenge(s):

My Card:
Tiny Tips:
My tip for this post is get out there and surf the web. There are some truly fantastic blogs and websites to take a look through to find helpful hints and inspiring ideas for projects. I have listed some of my favourite along the right side column of my blog and I encourage you all to take a peek!
Thanks for stopping by!

Up, Up and AWAY!!!

Happy Occasions Mini/Sale a Bration Preorder day everyone J Oh yes and the 1st of December too!!! Our week continues to be a little gray here in Ottawa so again I chose to brighten up my craft space with an uplifting card for this week’s Freshly Made Sketch.

My family and I will be heading home to Nova Scotia 2 weeks from today to spend the Christmas Season with our family and friends. I am sooooo looking forward to this time and break from the busy couple of months I have had but already my mind is looking forward to 2012.

In January I am going to be holding a 3 month Birthday Card Club and I believe this card may be one of the 9 designs we will be going with...

My Challenge:
My Card:
Tiny Tips:
I am not sure about you all out there but I am not a huge fan of the craft ink. I find it a little hard to work with because of the added drying time required. That being said I often have a need for some white on my cards and thus my solution is to use my versa mark, white embossing powder and heat tool. Yes there are a few extra steps required but I find the end result to be exactly what I am looking for! Just love these "puffy" clouds.

Thanks for stopping by!

Monday, November 28, 2011

"When you are in love you can’t fall asleep because reality is finally better than your dreams"...

Dreary day here in Ottawa so I decided to make something Pretty to brighten up my day J Now that my Holiday Card Club is winding down I have started to think about the New Year and all the exciting things moving forward. I have started to plan my Valentine’s Day Card Class and thought I would give you all a sneak peek of one of the 3 card designs we will be using!

This week Pals Paper Challenge was to use pearls as the embellishment to add a little sparkle to our project. I thought that would tie in quite nicely with the card I had designed.

“When you are in love you can’t fall asleep because reality is finally better than your dreams”.  ~ Dr. Seuss

My Challenge:
My Card:

Tiny Tips:
I love to use my Stamping’ Around Wheels but I am not always the most accurate in my placement. Sometimes that is okay if you are going for a more abstract look but on this card I wanted to have a nice clean line and so I decided to break out my Stamping’ Around Wheel Guide. It is the perfect tool to provide you with perfect placement of your stamped image.

Thanks for stopping by!

Saturday, November 26, 2011

Thank You!

As most of you know Ottawa is not our home. We are originally from Nova Scotia and moving to Ontario was a HUGE change for us. We have such wonderful family and friends back home that were very hard to leave but job opportunities brought us here and here we have been for over 4 ½ years now! Making friends is not easy to do when you are in a new city but I am happy to say that I have been fortunate to make some of the best friends a girl could ask for. We have been going through some rough times these past few months and I wanted my friends to know just how much we appreciate them now and always...


So for this week’s Friday Mashup I chose to make a thank you card because I am so very thankful to have each of these people in my life and cannot imagine how I would have gotten through the past few months without them!!! Usually I mash it up and rock out both parts of the Challenge but I wanted to make this card rather than a Christmas Card this week so here you go... J

My Challenge:
  1. Make a project featuring "A Christmas Theme".
  2. Or Make a project using the colors "Aqua, Chocolate and White".
  3. Or "Mash it Up" and create a "Christmas themed project using the colors Aqua, Chocolate and White".

My Card:
Tiny Tips:
Criss Cross Card
·   Two 4 1/4" x 11" pieces of cardstock for your card base (used tempting turquoise)
·   One 4" x 5" piece of patterned paper (used Berry Blossom DSP)
·   One 3 3/4" x 5 1/4" piece of cardstock for insert (used Chocolate Chip)
·   One 3 1/2" x 4 3/4" piece of neutral cardstock for insert (used Whisper White)
·   One 1 1/2" x 12" piece of cardstock for card band (used Whisper White)
Step One: Score both 4 1/4" x 11" pieces of cardstock at 5 1/2".
Step Two: Take one scored piece and cut it diagonally from center top to the bottom left.
Step Three: Take the other piece of scored cardstock and cut it diagonally from the center top to the bottom right.
Step Four: Add adhesive to the rectangle back of one of the cardstock pieces.
Step Five: Tape both pieces together. Make sure both long edges of the diagonal sections are on the bottom.
Step Six: Cut the patterned paper in half diagonally.
Step Seven: Adhere it to your card front.
Step Eight: Add Sticky Strip on the bottom of the middle panel, as well as on the bottom of the triangle flap that will be on top of the card. Tape the card base together and set aside. (I chose to skip this step and just adhered the insert into the actual card rather than have it slide in and out, so when you take the band off the card flaps open up on either side!)
Step Nine: Take both pieces of cardstock for the insert and use the corner rounder on the top corners.
Step Ten: Tape together.

Step Eleven: Stamp and add tab and other embellishments as needed.
Step Twelve: Take the 1 1/2" x 12" piece of cardstock and score at 5 5/8" and 11 1/4".
Step Thirteen: Add Sticky Strip™ to the end of the strip with the small 3/4" scored section. Tape the band together.
Step Fourteen: Decorate the card band.
Step Fifteen: Slide your band over your card. Your card is finished!
For an excellent tutorial with pictures step by step head over to http://www.splitcoaststampers.com/resources/tutorials/criss_cross_card/.
Thanks for stopping by!

Friday, November 25, 2011

Fresh & Clean Christmas!

This evening is my monthly stampers club and we will be making two fun Christmas cards and I thought I would share one with you. I decided to use the sketch provided by Freshly Made Sketches and will be entering this card in their weekly challenge.

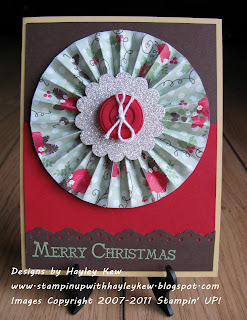
I have been very into making rosettes lately, I LOVE my score tool and any chance I can use it I do! There are so many fun looks you can go with. This week I decided to keep with a basic design to keep the card simple and clean. I went with the colour theme from Stampin' UP!'s Holly Berry Bouquet DSP. Love the colour embossing powder and Wild Wasabi fit this card perfectly. 

My Challenge:
 My Card:
 Tiny Tips:
Over the past few weeks I have been struggling with the best choice of adhesive when making my rosettes and today I came to the conclusion that a hot glue gun works the best. It dries almost instantly and provides an excellent firm base for the centre of your rosette. You can be certain it will not come apart when assembling your card.  
 Thanks for stopping by!

Thursday, November 24, 2011

Glamette Once More :)

The ladies over at Friday Mashup loved my "Breaking Dawn" inspired card!!!

And for the record totally team Edward {heart}


Tuesday, November 22, 2011

"Do I Dazzle You"?

Half way through the week!!! Looking forward to this weekend we will be putting up our outdoor Christmas lights and helping our in laws decorate their house as well J Just love this time of year.

For this week’s Friday Mashup I took a break from Christmas cards as I was very inspired to create a unique card after seeing a movie that I have been waiting a LONG time to see... Can you guess which FABULOUS movie I am talking about?

My Challenge:

  1. Make a project using "Paper Rosettes".
  2. Or Make a project using "the Sketch Above".
  3. Or "Mash it Up" and create a "Project with the Sketch using Rosettes".
 My Card:
Tiny Tips:
When you adhere the two ends of your rosette together make sure to put the adhesive on the right said of the DSP in order to give yourself a finished edge. I made the mistake of not doing that and then had to hide my oooppppssss with a different element which after I had done so was very happy about because I feel it gave this card a fantastic finished look!  
Thanks for stopping by!

Snow Much Fun!

Hope you have all had a great start to your week. As always I have been busy stamping away and this is what I came up with for the Pals Paper Arts Challenge this week! Let it snow, let it snow, let it snow... I am saying that now but I might be singing a different tune after a month of actual snow J


Once again I went with the colour theme from Stampin’ UP!’s Letters to Santa DSP. I have fallen in love with Riding Hood Red, also when a saw Snow Much Fun I just HAD to have it. My son loves snowman and after he saw this card he carried it around the rest of the day J

My Challenge:

My Card:
Tiny Tips:
Want to make your image “POP”? Rather than just using your Basic Black ink pad go the extra step and fire up your heat tool with your black embossing powder! Small tip I will give you is to then watch when you are colouring with your stampin’ mark markers as when the ink gets on the glazed embossing powder it will rub off onto your paper if you are not careful J   

Thanks for stopping by!

Monday, November 21, 2011

Time to Decorate!!!

Season’s Greeting, Peace on Earth, Merry Christmas! Okay not quite yet but Holiday Card prep is in full swing and I am excited to share with you my submission for this week’s Freshly Made Challenge.

For the challenges this week I have stuck with the colour theme from Stampin’ UP!’s Letters from Santa DSP. I was really not sure how pink would fit into the equation but it works very well on this ornament sheet and so I decided to go with it!

Hope this card gets you thinking about putting up your Christmas decorations! We are planning to get started this coming weekend J

My Challenge:

My Card:
Tiny Tips:
I find bows to be a little difficult to make with a stiffer ribbon but still wanted to add a piece to this card and so I went with a “cheater bow”. So now how do you make sure you have the side of the ribbon showing that you want? After making your loop make sure you have the correct side of the ribbon on either side facing forward before you tighten your knot!

Thanks for stopping by!

Sunday, November 20, 2011

First Snow of the Season!

WOW! Did not intend to take that long of a break from blogging but time got away with me and here we are November 20th!!! I will be getting this post in just under the wire but here we go J

For this week’s Mojo Challenge I decided to go with the colour theme from Stampin’ UP!’s DSP Letters to Santa. We had our first little snow flurry this weekend so I was inspired and wanted this card to have LOTS of snowflakes on it.

December is the last month for my Holiday Card Club and I have been toying with new ideas for my cards as the designs I have previously come up with were just not doing it for me anymore J What do you think? Is this a keeper?

My Challenge:
 My Card:
Tiny Tips:
Texture can add dimension to the simplest card. You can achieve this look by doing a number of things. On this card I chose to go with layering of paper types as well as embossing with my big shot.
Thanks for stopping by!

Saturday, November 19, 2011

I'll Be Back!

Hello Readers J
To say this has been a busy month for me would be an understatement! I will be back blogging this week for sure. Hope you are all well and getting excited about the upcoming Holiday Season!!!

Thursday, November 3, 2011

Chocolate Elegance

Happy Thursday readers! The weekend is almost here and we are going to have 3 full days of sun (according to the weather station) so let’s hope it happens because I have loads of laundry to do J Also this weekend I have been invited to run a workshop hosted by my lovely sister in law. The timing could not be better Stampin’ UP! just announced their newest promotion, hostesses can earn an extra $45 in additional Stampin' Up! products when they host a $450 workshop (along with the $70 awarded at that level this means $115 in FREE PRODUCT!!!) between November 1st and December 15th. If you would like to host a workshop and take advantage of this offer please feel free to contact me as I do have spots remaining for this time frame!

This week’s Pals Paper Arts Challenge is a colour challenge. We were asked to use Early Espresso, Soft Suede and River Rock. Hmmmm is anyone else thinking chocolate J I had thought about using “Eat Chocolate” but I try as much as I can to stay with current product and so I chose to go with the more vintage look of “Established Elegance” which I just received last week. I also decided to try out a new technique the “Brick Wall” with the collage that I stamped. Hope you like what I have come up with!

My Challenge:

My Card:


Tiny Tips:
For the “Brick Wall” technique I followed along with the tutorial given by Birgit Edblom at Split Coast Stampers. I did however add my own little touch! After I had each brick piece cut out I sponged each edge with Soft Suede to give more defined edges before placing it on my card stock to mount.


Thanks for stopping by!

Wednesday, November 2, 2011

Cracked Glass Birthday!

Can you believe November is already here! Time is flying by and we are charging ahead to 2012. It was a bit of a dull day here in Ottawa so I decided that for this week’s Freshly Made Challenge I would go with bright colours J

I realized today that not only do I have one fabulous stamping friend having a birthday this month I have THREE!!! So that means birthday cards are in my crafting future. This one will be making its way to a very special gal on the East Coast.

I am always looking to try new techniques (split coast stampers have fabulous tutorials on their website) and so I decided to give the “cracked glass” effect a shot this afternoon. I was very happy with the results and hope you all enjoy it too.

My Challenge:
 My Card:
 Tiny Tips:
Cracked Glass Technique...

·        Stamp image

·        Rub versa mark ink pad over the entire image to be embossed

·        Apply first layer of clear embossing powder

·        Heat with heat tool

·        Apply at least 2-3 more layers of clear embossing powder (to add your subsequent layers you may apply powder when project is still heated or wait for it to dry and then apply another layer of versa mark ink)

·        After all layers have been completed put project in freezer for a few moments to ensure it is cooled

·        Bend paper until it forms cracks in many different spots

·        Use a sponge and dark ink colour and rub over entire embossed surface to accentuate the cracks

·        Use a tissue to rub off access ink from embossed surface.
Thanks for stopping by!

Tuesday, November 1, 2011

Mojo Welcome

Candy anyone? How about a little eye candy J Here is my Mojo Monday card. This is the third and final “welcome” card to be given to my last new recruit!

As I mentioned I wanted to their cards to be personal to them and it just so happens that this special women is expecting her 2nd child this spring a new niece or nephew for me!!! It felt fitting to use the colour theme from Stampin’ UP!’s Nursery Suite dsp and since we are not sure if there is a little princess or pirate in there I decided to keep it neutral!

As you can see my big shot played a huge role in this week’s card. I used many different elements to make this card pop. Stampin’ UP! has decided to extend their current promotion until November 11th. If you are interested in getting a FREE BIG SHOT (or $125.00 in merchandise of your choosing) for only the cost of a starter kit $215.00, please feel free to contact me and join my team today! This is a $560.00 value for $215.00 (tax and shipping INCLUDED!).

My Challenge:

My Card:
Tiny Tips:
Though I bought it months ago today was the first time I used my Blossom Bouquet Triple Layer Punch. I absolutely love it but have a little tip to help you get the best results possible when using this punch. You will want to make sure that you are standing and pressing down evenly on a very sturdy table.
Thanks for stopping by!