Pages

Sunday, January 29, 2012

You make my whole face SMILE!

Hope you have all had a nice weekend. It was a beautiful one here in Ottawa loads of sun and reasonable temperature as well. I was busy working but my husband and son were able to take advantage of the weather and get a lot of sledding in. My little trooper took a tumble today on the hill and has a little road rash on his cheek but his daddy told him not to worry because, “chicks dig scars” lol.

New, New, NEW who doesn’t LOVE NEW stamping items!!! With the Occasions Mini and Sale a Bration in full swing this demo had loads of NEW items. So this week’s Friday Mashup Challenge was PERFECT for me to break into my new stash once more! I used the Calypso Coral and Lucky Limeade 1/8” Organdy Ribbon (which I LOVE, LOVE, LOVE I might add) and a Sale a Bration stamp set Sprinkled Expressions, super cute J
If you would like to find out how you can get your hands on these two fabulous Sale a Bration items please feel free to contact me (stampinupwithhayleykew@gmail.com) and in the meantime take a peek at the Sale a Bration page on the Stampin’ UP! website - http://www.stampinup.com/ca/enc/20584.asp

My Challenge:

  1. Make a project using the "Sketch".
  2. Or Make a project using "Something NEW in your stash". (Stamps, ribbon, pretty paper...anything!)
  3. Or "Mash it Up" and create a project "using the Sketch & something NEW in your stash".

My Card:

Tiny Tips:
How to tie the perfect bow – something this gal has to work at J Thank you KT Hom Designs!


Thanks for stoppin’ by!

Saturday, January 28, 2012

So Good To “Gnome” You!

From the moment I saw this little set in the Occasions Mini I knew I MUST have it. There is one person that I can think of in my family who will love the little Gnome cards they will be receiving over the next year hehehe J

I decided to break this set out of the box for this week’s Freshly Made challenge. We were given a great sketch and now that I had my stamp set picked all that was left was the colour theme. So off to Google I went (what did we do before Google). I wanted to keep with the “traditional” Gnome colours and I was able to find some great pictures for reference.

My Challenge:

My Card:

Tiny Tips:
Just a small tip this post one that you think I would have learned by now! When colouring with the basic black marker give your piece some time to dry before mounting it as the black ink for some reason takes a lot longer to dry than the others and it WILL smudge!

Thanks for stoppin’ by!

Thursday, January 26, 2012

Mojo Throwdown!

Almost made it to the end of the week stampers, it has been a one of ups and downs for me but I’m still standing J A good friend of mine has a little girl who will be celebrating her 6th birthday next week and I wanted to make a fun card for her special day!

I decided to combine this week’s Mojo Monday Sketch with the colour combo Challenge at The Colour Throwdown. I have been itching to use my new scented embossing powders and thought this would be the perfect time to break them out. I was a little weary about purchasing them as I am quite sensitive to scents but I was pleasantly surprised that the finished product is very subtle and quite pleasant. Mmmmmmmmm vanilla!

My Challenge(s):


My Card:

Tiny Tips:
Want to add a little glitter to your card but don’t want the mess of using dust glitter, the perfect solution rhinestones!!! They are easy to use with self- adhesive backs and what little girl does not love a little bling!

Thanks for stoppin’ by!

Monday, January 23, 2012

A Card for Baby

Yesterday I had the pleasure of attending a baby shower for a really good friend of mine. Not only am I lucky to have this wonderful women as a friend but I will be working with her and her husband next month when their baby arrives as their doula. I am so very blessed to have the 3 BEST jobs in the world. #1 being Ethan’s Mother, #2 being a Birth & Postpartum Doula and #3 being a Stampin’ Up demonstrator J

Wanted to make baby a very special shower card and so I decided to use the Pals Paper Arts sketch this week to get me started. The parent’s to be have gone with a woodland theme nursery and wonderful colour theme. I thought it would be neat to try to combine both into this card. I had to go into the vault and use a stamp set that has been retired but it was so perfect I just had to do it!

My Challenge:

My Card:

Tiny Tips:
The weekly challenges that I take part in give you loads of room to add your own creativity into each challenge. Normally I stick to the placement and dimensions of the sketch to a T but this time I used a little wiggle room as I wanted to make sure you could see at least one set of trees in the back ground.

Thanks for stoppin’ by!  

Saturday, January 21, 2012

Valentine Love

Just a quick post before I head off to bed J

Valentine’s Day is approaching and so I have been making special cards for those loves in my life! This week I combined the Freshly Made Sketch with the Colour Throw Down Swatch and this is what I came up with.

My Challenge(s):


My Card:

Tiny Tips:
A fun way to add a little colour to your main card stock is to use the letterpress plates from Stampin’ UP! I chose the Heart Pressed and Lots of Love plates for this card and simply used my brayer to apply the real red ink to the plate before sliding it through my big shot. Now I had to be very careful and steady handed to get it on my first try as any shift in the cardstock will smudge your image.


Thanks for stoppin’ by!

Friday, January 20, 2012

TGIF!

It has been a busy week for me so I have been looking forward to the weekend since about Tuesday morning J It will be a busy weekend but loads of fun things going on starting with my birthday card club class this evening.

This week at the Friday Mashup our Challenge was to explore the world of paper piercing and if we wish we could add the colour combo aspect as well. There are some fabulous “paper piercers” out there who are happy to share their ideas with us up and comers, which was a huge help this week. When I settled on the design I wished to go with I thought I would create an elegant look with this card.

My Challenge:
  1. Make a project using "Paper Piercing".
  2. Or Make a project using the colors "Blushing Bride, Riding Hood Red & Early Espresso".
  3. Or "Mash it Up" and create a project with the "Color Combo & Paper Piercing".

My Card:
Tiny Tips:
When attempting to create an elegant vintage look I tend to use my cutter kit, in particular the distressing blade. Also adding the dark sponging around your focal point helps to make it pop!
Thanks for stoppin’ by!

Wednesday, January 18, 2012

Pure Enchantment

Sunny +16 in San Antonio, Texas, USA and Sunny -22 in Ottawa, Ontario, Canada... Hmmmm where would I rather be right now??? The answer at Stampin’ UP!’s Leadership conference so I am setting that goal for myself for next year – you heard it here! My up line is in the states taking in this conference and I CANNOT wait until she gets home to hear allllll about it J

Last week I was picked as a Friday Mashup Glamette so I REALLY wanted to bring it this week and come up with a fantastic card to see if I could wow the ladies once again. Our challenge this week was to make a thank you card using designer paper. Sale a bration starts on January 24th and with my pre order I was lucky enough to get my hands on some of the fabulous products before their official launch. On this card I used the Everyday Enchantment Designer paper, ribbon and brads along with their colour theme.

My Challenge:
  1. Make a "Thank You" themed Project.
  2. Or Make a project "Using Designer/Patterned Paper".
  3. Or "Mash it Up" and create a "Thank You project with Designer/Patterned Paper".

My Card:
Tiny Tips:
Diamond Fold Card – this is the first time I have made a diamond fold card and I have to say I will be making more. I often feel like the cards we make are truly a piece of art and what a nice way to display such a piece. The one tool I found critical in the making of this card was my scoring tool!!!
Thanks for stoppin’ by!  

Tuesday, January 17, 2012

Birthday Card Club

This month I started a birthday card club. It will run for 3 months and each month we will make 12 cards, 3 each of 4 designs. I wanted to make sure we had something for everyone so one card will be suited towards women, one towards men, one towards a little girl and one towards a little boy J

There are two classes per month being offered and we had our first session this past weekend. Here is a sneak peak of the cards we made! Can hardly wait to share next month’s designs!!!


Thanks for stoppin’ by!

Friday, January 13, 2012

I dig you... So you’re invited!

Our son will be turning 3 next month - HOLY MOLY where has the time gone? He has been very into dinosaurs for the past year so we thought it would be fitting to have a dinosaur theme birthday party for him. Those of you who know me know how much I love to throw a party and sometimes may (perhaps) go a little over board with the decorations. I think I may have set a bar a little high with Ethan’s 1st under water theme birthday party and last year’s 2nd train theme birthday party so this year I decided to give myself (and all of the wonderful family and friends who have helped out in the past) a break and have his party at an indoor play place for kids! We selected the dinosaur theme party so this year both my husband and I will be able to kick back and enjoy, rather than being up until 1am the night before finishing the decorations J

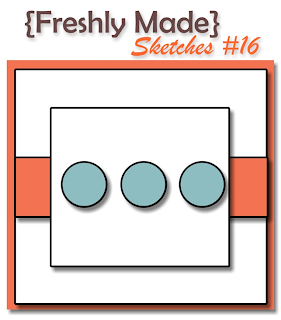
I did however want to make his invitations!!! I loved the sketch for this week’s Freshly Made Challenge so I decided to go ahead and use it as the template for Ethan’s invitations.

My Challenge:
My Card:
Tiny Tips:
It is possible to make a simple card still receive that WOW from its recipients! One of my tricks for doing so is adding lots of layers and textured papers. On this card I used two different embossing folders, my crimper as well as sponging to add another element of texture.

Thanks for stoppin’ by!  

Glamette Kew

Thrilled to have been chosen this week as a Friday Mashup Glamette! I have had a very busy week of card prep for my upcoming classes this weekend but cannot wait to get started on this week’s challenge a little thank you/dsp action coming your way later this week J


Monday, January 9, 2012

Turlte & Co. - Birthday!

Happy Monday!

I thought I had missed my chance to post for Freshly Made’s Challenge but I am getting this one in just under the wire!
I am in a birthday card mood lately. I am starting a monthly birthday card club this month and cannot wait to get started. We are going to be making 4 card designs per night – little boy, little girl, feminine and masculine card per night something there for everyone!

My Challenge:
My Card:
Tiny Tips:
I was in love with this little stamp set from the moment I saw it and the fact that Stampin’ UP! makes a donation to Ronald Macdonald House Charities with each purchase of this set makes it all that more appealing. Our family was impacted by the wonderful work of RM House, they help so many wonderful families going through very tough times so go ahead and purchase Turtle & Co. and help support RM House and the good work they do!


Thanks for stoppin' by!

Sunday, January 8, 2012

Nautical Birthday Card for my Sweet Sailor

What a beautiful weekend we are having here in Ottawa J Hope you are all out enjoying the sunshine and snow!!! We took our son sledding for the first time this year and he LOVED it. We did try one trip down a small hill last year but he was NOT impressed!

My challenge this week from Friday Mashup was to create a birthday card. This happened to be the perfect challenge for this week because Thursday just happens to be my husband’s birthday J The birthday card was one part of the challenge the second being the use of chalks or pastels. That is not something that I have added to my collection yet so was not able to partake in that aspect of the challenge but did manage to rock out a pretty sweet birthday card (IMO) of course!

My Challenge:
 My Card:
Tiny Tips:
Waterfall Card Tutorial @ Split Coast Stampers http://www.splitcoaststampers.com/resources/tutorials/waterfall_card

1.    Cut your Neutral Cardstock in the following measurements: 5¼" x 8" (1), 1 5/8" x 1 5/8" (4). Cut your Colored Cardstock in the following measurements: 2" x 2" (4), 5½" x 4¼" (1), 9" x 2" (1), ¾" x 4" (1).

2.    Fold the largest piece of neutral colored cardstock in half, and then stamp it as desired. Also stamp the four neutral-colored squares.

3.    Attach your stamped squares to the slightly larger colored cardstock squares with your adhesive.

4.    Next you will need to score your 9 x 2 strip of colored cardstock. Starting at end of strip, score 2", 2¾", 3 ½", and 4 ¼" from the end.

5.    You can then fold along the scored lines and you should have a strip which looks something like the following picture (let's call this Piece A).

6.    Attach the horizontal strip (the one which measures ¾" x 4") to front of card with eyelets or brads.
Note: it is very important that you do not use any adhesive in the middle of this piece!

7.    Next, attach piece A to the horizontal strip you just attached to the card front. To do this, slide the longest section of piece A between the horizontal strip and the card, making sure to center it in the middle of your card. Line up the very edge of the scored end of piece A with bottom of the horizontal strip and attach with adhesive.
Note: the adhesive placement is very important you do not want to attach the scored side and the longest section of piece A together!

8.    Attach your first stamped image to the bottom 2" x 2" space at the scored end of piece A.

9.    Apply adhesive to the scored sections of piece A only, and attach remaining stamped pieces.

10. Once you've attached these pieces, you should be able to gently pull the bottom of the longest section of piece A directly down and watch the stamped images flip one at a time and then slide behind piece A.


Thanks for stoppin’ by!

Friday, January 6, 2012

Butterfly, BLUE, Thank YOU!

I survived my husband’s first day back to work after our Christmas holiday together. My son and I spent most of our day in the kitchen cooking and baking things to freeze for the winter because WINTER has come to Ottawa brrrrrrr!

I did manage to squeeze in a little crafting as well while my son took his nap. This week’s Pals Paper Arts Challenge was a colour challenge. We were asked to design a project using Baja Breeze, Not Quite Navy & Very Vanilla. I have to say I do like this colour combo and know a very special great grandmother of mine who will love this card!
I was in the mood to try a new technique and I came upon Reverse Spotlighting and thought I would give it a try. Never a dull moment when you have so many fabulous tutorials to inspire creativity at Split Coast Stampers J
My Challenge:
My Card:


Tiny Tips:

Reverse Spotlighting...

1. Stamp images in desired ink.

2. Punch random holes in stamped images (1-3/8" circle punch used in example).

3. Stamp and cut out the same image on pieces of coloured card stock.

4. Line up and mount images behind punched holes.

5. Trim overlaying images with scissors or paper cutter.

6. Mount images into place for completed project.


Thanks for stoppin’ by!

Thursday, January 5, 2012

Are you Twitterpated? I sure AM!!!

Moving right along this week with my Mojo Monday post!

As I mentioned in a previous post I have had the pleasure of using some of the new products being released this month from Stampin’ UP! I chose to keep exploring these fabulous items and for my Mojo Monday Challenge I decided to go with the Twitterpated colour theme and gorgeous designer paper.

I could not stop there I also used the twitterpated designer buttons, P.S. I Love You stamp set, Hearts Collection Framelite Dies and Fashionable Hearts Embosslits Die. All of these products and more I just CANNOT WAIT to share with all of you in my upcoming classes and clubs!!!

My Challenge:
My Card:
Tiny Tips:
Being the lucky demonstrator that I am, I have a fabulously talented Stampin’ UP! mentor (Monica Hornof check her out at http://stampsnjewels.blogspot.com/). She is always passing on loads of helpful hints to us so we may in turn pass them along to you. Here is a must know about the proper use of the NEW framelites!
1. Cut out your larger shape with the larger framelit.
2. Only THEN place your smaller frame where you want it on the shape and cut out the frame.
*** DO NOT put the two frames on at the same time. The larger one will likely shift over top of the smaller one, which will warp the die and even possibly cut into it***
Thanks for stoppin’ by!

Wednesday, January 4, 2012

2012 Sparkle and Shine

I was quite excited to see that this week’s Friday Mashup Challenge was a New Year inspired card with lots of “sparkle”! We had a very low key New Year and did not actually stay up late enough to ring in the New Year so it was great to be able to express the glitz and glamour of New Year’s Eve with this week’s project.

With January in full swing at Stampin’ UP! we are retiring the Holiday Mini catalogue and launching the NEW Occasions Mini catalogue AND starting a little later this month Sale a Bration. Being a Stampin’ UP! demonstrator has countless benefits one of which is being able to preorder NEW items before they are available to the general public. I could not wait to take them for a test drive and used two such new products on this card (Cherry Cobbler Dazzling Details from the Occasions Mini and Sprinkled Expressions Stamp Set from the Sale a Bration catalogue).

My Challenge:
So here is the "Mashup" Challenge:

  1. Make a project that "Sparkles".
  2. Or Make a project "Celebrating the New Year".
  3. Or "Mash it Up" and create a project "Celebrating the New Year that Sparkles".
My Card:
Tiny Tips:
Dazzling Details glitter glue is a beautiful addition to the Stampin’ UP! arsenal. The only thing to remember when using this fabu product is that it does take a little extra time to try. You want to make sure you give yourself plenty of time to let your card dry before sending it off. I also find it is best to fully assemble your card and then add your glimmer look as a final touch.


Thanks for stoppin’ by!

Christmas THANK YOU!

We landed in Ottawa early yesterday morning and I could not wait to get back down to my craft room. We had an absolutely wonderful Christmas and New Year with our families but 3 weeks away from my crafting was a bit tough J If only there was some way to take it with me...

While I was away I was unable to take part in the weekly challenges so I was thrilled to see that the end date had been extended for the last 3 Friday Mashups, next up a lovely sketch and watercolour challenge. I will be the first to admit that I am not the best when it comes to water colouring but I am putting in the time and practise makes perfect (someday lol).

Our son was one lucky boy and was spoiled rotten for Christmas. Call me old fashioned but I sure love to send out handmade thank you cards to all of those wonderful people who take the time to share a Christmas present with my family and here is one I will be mailing out shortly!

My Challenge:
So here is the "Mashup" Challenge:

  1. Make a project using the "Sketch".
  2. Or Make a project using "Watercoloring".
  3. Or "Mash it Up" and create a project using the "Sketch & Watercoloring".

My Card:
Tiny Tips:
There are a few different ways to watercolour an image. I chose to go with the ink and aqua writer technique. I simply press my ink pad cover into the actual ink pad while still closed to transfer a small amount of ink to the cover, open the ink pad, pick up a small amount of ink with my aqua writer and off I go!


Thanks for stoppin’ by!