Pages

Tuesday, April 3, 2012

A Joy Beyond Compare!

I had a little down time this afternoon so I decided to explore the web to see if there were any other Blog Challenges out there that I might like to take part in. So here is something new for a Tuesday http://trystampinontuesday.blogspot.ca.
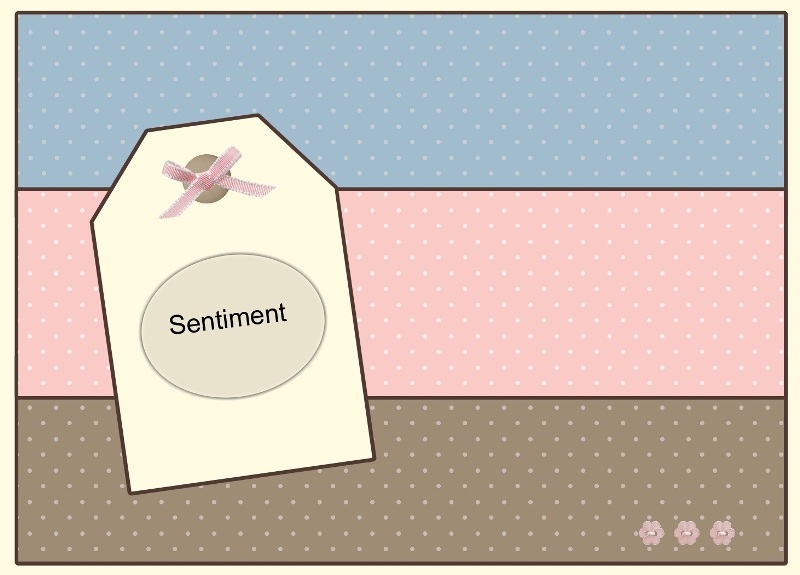
When I saw this sketch I just had the perfect idea for a card and could not hold it in any longer! After a tremendously difficult couple of months Mark, Ethan and I are very excited to announce that we will be blessed with a new little person into our family this coming October. I am now in my second trimester and all is well. We are being cared for by the lovely midwives at Ottawa South Midwives http://ottawasouthmidwives.com and truly look forward to this next step in our lives.

My Challenge:
My Card:

Thanks for stoppin’ by!

Sunday, April 1, 2012

Dream, Imagine, Create!

Happy April 1st Everyone!!! Hope you have all had a really nice weekend. We had a busy but fun one for sure. Looking forward to next weekend, Easter Weekend, FOUR DAY WEEKEND YAHOOO J

My post today I have taken on two challenges in one. First off the Friday Mashup Fan Challenge Winner and for the sketch I went to another favourite site the Freshly Made Sketches Challenge. When the Occasions Mini came out and I noticed all 5 of the 2011-2013 In Colours in the bakers twine I just had to have them all. I love adding bakers twine to my projects. It is a really creative, inexpensive embellishment!

This is the first project I have been able to use so many different colours and I just had a blast. Now mind you I would not want to have made 50 of this card as the little kite was quite labour intensive but when I saw the final product it was TOTALLY worth it. When I asked my husband what he thought he said, “I think you may be the only one crazy enough to sit here that long winding up twine” J Thanks sweetie!

My Challenge(s):

  1. Make a project using "Colorful Twines".
  2. Or Make a "Kite themed" project.
  3. Or "Mash it Up" and create a "Kite themed project using some colorful Twine".

My Card:

Tiny Tips:
When taking on a project like this best not to cut corners and just take your time. At first I thought I would use just regular snail adhesive on each individual kite piece but after getting started I realized I needed something stronger to really hold it in place. So I broke out my sticky strip, and though I have to admit I really don’t enjoy using that product it sure did the trick for this creative kite!

Thanks for stoppin’ by!

Sunday, March 25, 2012

Fly Away Ladybug

Hope you all had a lovely weekend. I am getting this post in just under the wire so it will not be a long one as I am also one tired mama J

When I saw this sketch last week the first thing that popped into my head was how much I loved the simple design and the second thing was ladybugs! Those of you who know me well know that I love ladybugs and have for some time. 

Hope you like my simple colourful design J

My Challenge:

My Card:

Tiny Tips:
At this time of night I am fresh out of crafty tips but I have another kind of tip for you, that is find something in life that makes you happy and just do it! A lot of people kind of think it is a little strange how much I enjoy paper crafting, I cannot explain it I just do! I find it very relaxing and you know what when I get a call or an email from someone who has received one of my cards saying it made their day that makes me smile and really that is why I do it. It brings me joy to bring joy to others in the simplest of ways J

Thanks for stoppin’ by!

Saturday, March 24, 2012

Ship to Shore!

WOW! It seems like it has been forever since I did a blog post. This past month has been a busy one for me. So many projects on the go and little time for weekly blogging but that is going to change. The spring is going to be a little less busy for me, but those who know me know that is still busier than the average person J What can I say I like to be on the move!

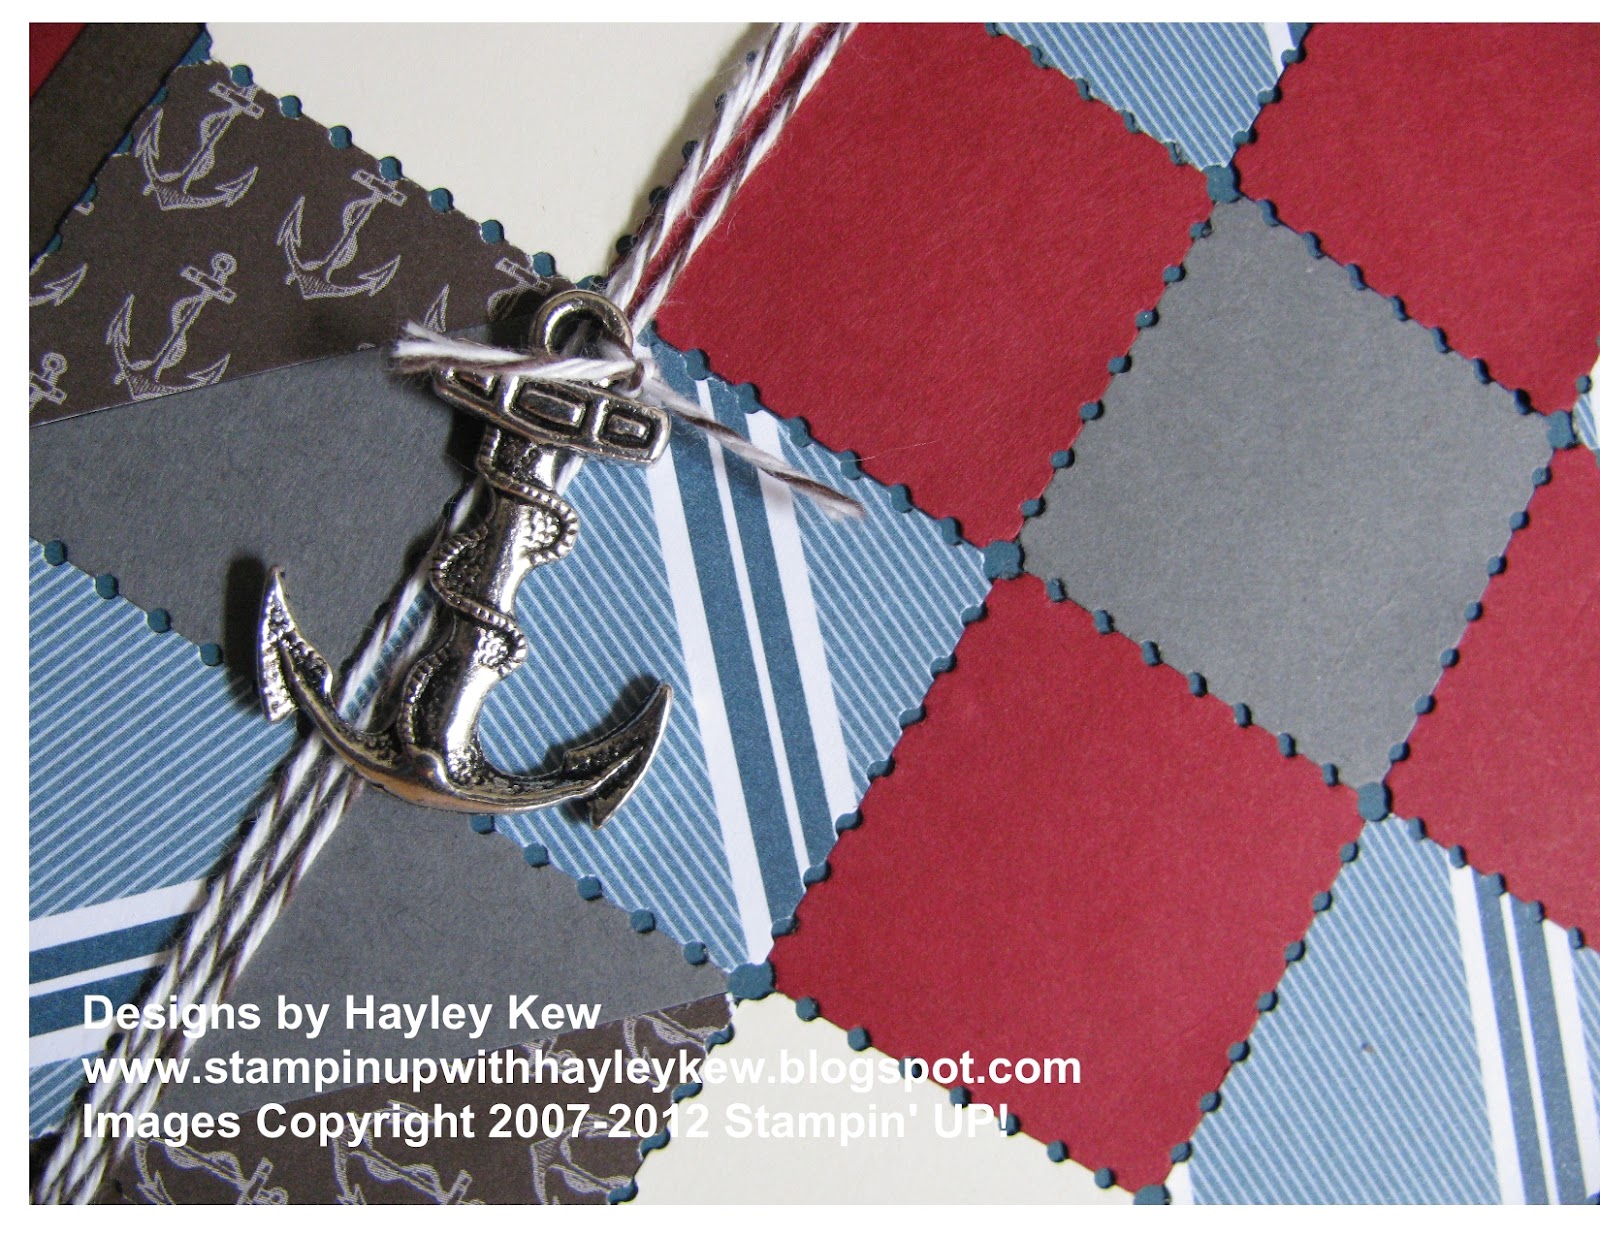
I was really excited about this week’s Friday Mashup Challenge because one of the projects I have been so looking forward to but have had no time to start is some of the wall art that I am making for our son’s nautical theme room. He is very fortunate to have such artistic and talented people in his family (hopefully he considers me one of them hehe). This summer when we were home on holidays in Nova Scotia, his Great Aunt Wendy presented us with a painting of Ethan she did from a picture I had taken of him at the beach. It is just fabulous and that was the first new piece for his room. When Ethan’s Grandma came to visit us early this New Year she painted a mural on his wall of one of our favourite beaches in Nova Scotia. He is one lucky boy to have his own seascape in his room when he wakes up every morning!

My contribution to this week’s challenge is square one of 9 which I will be mounting on a 50”x50” canvas and adding some picture of Ethan’s very first trip out on his Grandpa’s boat which we plan to do this summer! We were going to try last year but thought perhaps he was still a little too young. We will cross our fingers that this year he will have his sea legs about him at 3 1/2 J

I am a crafting pack rat and keep pretty much everything that I love even after it retires! When this designer paper came out in last year’s Stampin’ UP!s Summer Mini I fell in LOVE. We actually painted our son’s room Not Quite Navy on the bottom, Whisper White on the top with a Cherry Cobbler chair rail around the middle of the wall. I picked up this anchor charm while at a little shop in Nova Scotia last summer and have been holding on to it ever since.  

My Challenge:
1.    Make a project using the "Quilted Cards Technique".

2.    Or Make a project using "Something that's been forgotten (sitting in your stash forever)".

3.    Or "Mash it Up" and create a "Quilted card with something you've forgotten about".

My Project:

Tiny Tips:
When taking a look through all of the “quilted” card designs I noticed that everyone had gone with a straight cut. I wanted to do something a little different and really felt the postage stamp punch would all a little more texture to this panel. It is nice to sometimes think outside the box!

Thanks for stoppin’ by!

Wednesday, March 14, 2012

Enchanted Spirelli

It is a rainy day here in Ottawa so what better thing to do than to create some sunshine in my craft room J I am all prepared for my two classes this weekend so that frees up a little time for me to take part in my usual weekly card challenges. First up – Freshly Made Sketches!

March is the last month of Sale a Bration and I have been dying to crack into some of the new products I got to take advantage of during this fabulous sale! I chose to do with the Everyday Enchantment suite for this card. I love that it uses so many of the 2011-2013 In Colours. I have been searching around for a way to use the pretty in colour bakers twine and came across this exciting tutorial over at Split Coast Stampers for a technique called Spirelli.

My Challenge:

My Card:

Tiny Tips:

Spirelli – for the full tutorial pop on over to see Susie Nelson @ SCS!

http://www.splitcoaststampers.com/resources/tutorials/spirelli


Thanks for stoppin’ by!

Sunday, March 11, 2012

Birthday Craft Day!!!

What a beautiful sunny day here in Ottawa!!! My family and I took hit up The Stanley Farm Sugar Shack this morning and had a blast. Today is the last day of my mother’s visit so we wanted to do something fun J We had never been before and would totally recommend it. Our son was a little nervous of the petting farm part but he enjoyed his yummy pancakes and french toast and the play structure, as well as the horse wagon ride.

All set up for my birthday craft day!!!


It is soo nice to have my craft room back to clean and tidy working order. I celebrated my birthday yesterday by having a craft day with my family and friends. After the ladies went home for the day I popped back down to make my Freshly Made Challenge card. I was a little lost for colour so I also took a peak at The Colour Throwdown Challenge for the week and did a combo challenge.

My Challenge(s):

My Card:
Tiny Tips:
Tapestry Effect – Step by Step
·         Choose at least 3 colours to use for your piece
·         Sponge all over the white card stock (I usually start with the darkest colour and go to the lightest colour)
·         Ink up your stamp with white pigment ink
·         Pour clear embossing powder over the whole piece of cardstock and heat thoroughly
·         If you have some spots where it doesn't stick anymore, emboss what you have. Next dab the embossing Ink pad all over the cardstock, pour embossing powder over and heat again
Thanks for stoppin’ by!

Friday, March 9, 2012

Here comes Peter Cotton Tail...

HAPPY MARCH!!! I love this month not only because I celebrate my birthday but because it is the beginning of SPRING J And when I think spring I think beautiful pastel colours, sprouting bulbs and EASTER!!!

I had an absolute ball being a part of the Design Team over at The Friday Mashup for the month of February. I just could not wait to get back at the weekly challenges. This week we were asked to make a 3-D treat basket or pouch and if we wanted to use the colours Green & Yellow.

It has been a few weeks since I have been active in my craft room and I finally got my mojo back after taking a peak through several fabulous blogs and facebook pages. I came across a super cute project that a fellow stamper and her daughter had made and so when I say this challenge I just had to mashup her punch art Bunny with The Friday Mashup challenge. This little cutie will be waiting for my son on Easter morning... I know it would have been cuter to see him stuffed but I just could not trust myself to buy Easter chocolate quite this early lol J

My Challenge:
  1. Make a project using the "colors Green & Yellow".
  2. Or Make a "3-D project that's a Basket or a Treat Pouch".
  3. Or "Mash it Up" and create a "Treat Basket/Pouch using the colors Green & Yellow".
My Project:
Tiny Tips:
My tip for this week is to take a closer look. I really wanted to use a stamped image for the eggs on this project. I had a cute little set from last year which has retired but I really do my best to only use current products so I had to take a closer look at what I had. I had an order arrive just last week with Stampin’ UP!’s “Easterbunny” stamp set. The egg image was too small for this project so what I did was used the balloon from the hot air balloon a little bunny was floating in!
 
Thanks for stoppin’ by!